|
This procedure completly removes the seat bottoms, headrests and seatbacks Removing the center headrest Look under the headrest and remove the black plastic cap in the middle. You may want to remove the leather coverstrip that is attached with velcro first. Using a 10mm socket unscrew the nut and lift out the headrest, straight up. 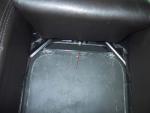
Now we have to remove both seat cushions. Non-electrical seats: Pull the metalclip on the front bottom of the seatbottoms, and pull up the seatbottoms. Remove from car and store safely. Electrical seats: Drive the seat(s) all the way forward. Igntion has to be in position II for rear seats to operate.
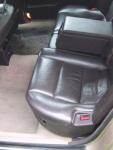
Remove the buttons on the front sides of the seats (towards the door). Pull them straight out, or pry carefully with a big flat screwdriver. Remove the 2 screws that hold the plastic cover as shown below. 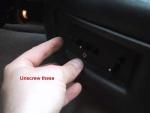
Remember to get the washer out with the first long black screw. Note the brass ones are short. Remove the plastic cover by pushing back the tabs by the buckle-fastener and pull up. Be carefull not to break the plastic. Pushing the seat leather / upholstery away usually helps. Now you should be able to see the 13mm bolt that holds the buckle-fastener. Adjust the seat forward or backwards as necessary to remove the bolt. Usually it's easily accessible in the fully forward position. The plastic cover can be removed, but it's not necessary. It's wedged between the door weatherstrip. 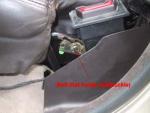
Let buckle hang, but unclip the connector from them. This connector is used to drive the headrests up when someone is buckled in the seat. 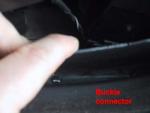
Working on the center front of the cushion, pull up the metalclip and pull up the seatcushions. Be carefull and remember to unclip the electrical connector underneat the cushion before you lift up the seat bottom. Otherwise you may break the connector clip under the seat. 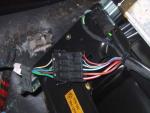
Remove seat bottom from car and store safely. Removal of the head rests Assuming electrical seats, push seatbacks fully back, drive rear blind down (if present). Pull straight up and remove headrests. They are not bolted in any way. Remove from car and store safely. Removing backseats Towards the center of the car, on each sides headrest-openings, remove 2 screws on each seatback that holds plastic headrest/buckle cover. Take care to not loose the brass washers that accompany them. When all 4 screws are removed, remove the plastic covers by pulling up on the side towards the center of the car, and unclipping the side that faces towards the doors. There is a clip on the cover on that side. Find a 10mm socket and unscrew the 3 bolts that go into the trunk wall. 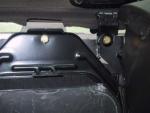
Only 2 shown here
Using the same 10mm socket unscrew the other bolt through the headrest hole. Note that the nut might need holding back from the trunk. One person can do this alone, using a long extention on a racket in the trunk and a 10mm fastener from the coupe. Check if all nuts are accounted for afterwords. The 3 middle should be fastened to the trunk wall. The outer ones too, but they tend to loosen. 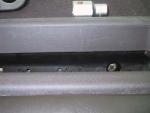
2nd bolts on seatbacks
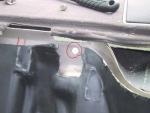
Nuts can come loose near door
Working under the seatback, unclip the electrical connector. Also unbolt the buckle which is secured with a 17mm socket. Take note of which buckle is top and bottom. Bolts hang on to the buckles because of the thin washers. This is normal. Save the big washers. Pull seatbacks straight up to unhook from chassis. Remove from car and store safely. Removing the center seatcushion and box First remove the cushion. There are 2x 10mm bolts that hold it in place, located on the bottom. Towards the tunnel. Lift out cushion in front and pull out forward. Remove from car and store safely. There is 1x 10mm bolt, and 2x 10mm nuts that hold the box itself in place. All located on the trunkwall. Remove the bottom 2 plastic nuts first. Note use caution since they are plastic. 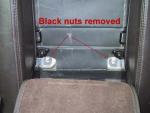
Then remove the upper 10mm bolt, if not already removed. Pull the box and frame out. Remove from car and store safely. Removing the grey insulation The trunk part is held in place by 4 plastic "mutters". Remove them and pull out insulation. Take care as it«s heavy and can break. Bottom one is just laid inplace, and can be taken out. Take care as it«s probably a bit stuck to the bottom, especially around the tunnel-area. 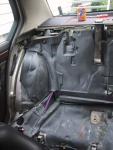 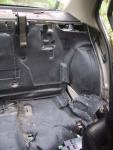
Click image for enlargements
Tips to go along This is a good time to check the battery, and grease up the electrical connectors using waterfree Vaseline. Also a good time to vacuum and clean up any dust and dirt that has collected throughout the years. Check all fuses under the left seatcushion. You may also want to grease up the relays and modules. But before you do, please remove the battery«s grounding and this leaving the car powerless to avoid breaking the modules. Check the 80A-link located behind the battery, in the black box with 3 or 4 thick wires going in/out of it. Also grease up the batteryconnectors. 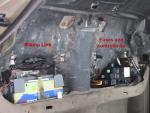
Secrets under the seats
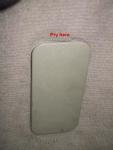 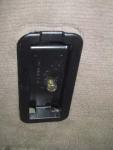 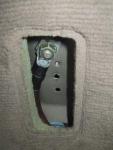
The ground wire
Relays, fuses and boxes Removing the rear speakers Using a big flat screwdriver, carefully pry at the corner towards the back window. It should unclip and pop up. Lift up in rear and slide out of front clips. Now using a stardriver, unscrew the 4 screws that hold the midwoofer (5"), lift out midwoofer, unclip connectors. The bottom box can be removed by unscrewing the 3 starscrews and lifting it straight out. Please take care if your soundsystem has tweeters and midranges installed, there will be additional wiring that might need disconnecting. Assemby Opposite of disassembling. Take care to connect all the connectors (seatbacks, cushions and buckle-fasteners). Also remember to securely fasten the bucklestraps. Use lock-tite if you find it necessary. To put the cushions back in draw the seatbacks forward and try to mate the outermost cushionpin to the seatbacks hole. Then carefully try and match the chassis matingpoints for the cushion. Lift up carefully in front and connect electrical connectors, then push down cushion to secure it in front. The centermost cushionpin and seatback hole will automatically mate. Takecare to put the velcro«d dustcollectors between the cushions and backs back in place.
|
 DIY articles
  7-series 86-94
  Rear Seat removal (electrical)