|
This applies to vehicles with wood trim interior. 
The front part of the centerconsole
Starting with the rear part of centerconole. Start by prying out the rear console cigarette-lighter and (if present) rearseat heaters. This whole black panel goes out by gently prying the top out and then lifting it out from the bottom. 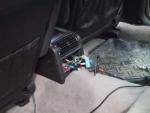
Rearconsole pried out
Remove all wires (seat heaters, cigarette-lighter and -lamp). Using a 8mm socket remove the bolts that secure the console to the tunnel (left and right sides). Remove any tapeholder, original telephone or cupholders from the centerconsole. Then unscrew the black screw from the open space (telephone) towards the front. 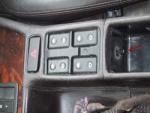
Remove black screw
Pull up the handbreak, and unclip the leathergasket. Pry out on top and then pull out from centerconsole. Remove the single screw towards the front. The console is now loose, but carefully lift up and pull over the handbreak. 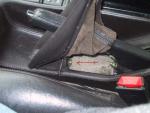
Remove brass screw
Remove from car and store safely. Now we go on to the front part of centerconsole. First remove the automatic gearlever handle. Put handbrake on, and shift to "1". Remove the allen-screw accessible from the front of the handle. 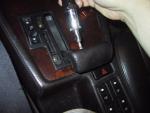
Allen-bolt
Press the switch under the handle up while you pull the handle out. Keep depressed or else you'll loose the white plastic inside it. Store safely. Pry out the Sport/Economy/Manual buttom from the centerconsole. Using a flat screwdriver and pry from the left or top/bottom sides. Unclip connector on bottom. Now pry out the wooden plate. Pry from the plate from the front part, or else you«ll break the rear clips that holds the plate down. Push plate forward and remove. Remove black plastic nut on the rear of the center console next to the handbreak.
Remove 10mm head bolt in the front middle console.
Unscrew the upholstery right to the steeringcolumn. A stardriver from the bottom to unscrew through little hole.
Open glovecompartment and unscrew 10mm head bolt near centerconsole. Same on left side, when upholstery bent carefully down. Centerconsole should now be loose. Lift in rear, pull gently backwards to unclip the 3 connectors behind the HVAC controller. Note the blue connector. First pull the black clip out 1/4" and then pull out blue connector from socket. Remove connector from ASC(+T) button and other buttons that might be present in the centerconsole. Remove the electrical window switches connectors from the bottom of the centerconsole. This is tricky. Be carefull not to break the connectors. The wires are short. Also remove hazard light connector from bottom. You can push the whole switch up through the console for easier access. Pulling out the console might be tricky, but take your time and slightly pull it toward the right to avoid the handbreak. Remove from car and store safely. 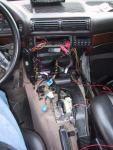
Centerconsole removed
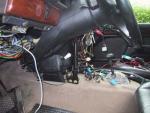
Another view
You can now remove the HVAC controller Cliped on from behind on the left side.
Unclip, push out and draw out from right side mounting. Assembly Reverse of disassembly. Take care to connect all connectors. Can be tricky to match the 10mm bolts to the dashboard. Also tricky to mate the 10mm centerbolt in the console to the floor. You might want to start with this, as the clip under falls easily out as the console moves back and forth.
|
 DIY articles
  7-series 86-94
  Center Console removal