|
The VCVs, or the Crankcase Ventilation as it´s also known as, has been known to cause various problems from high oil consumption due to positive crankcase pressure, to problems with the automatic transmissions. They are easy to replace and shouldn´t cost you more than about $50 in parts for a V12 (double set) including gaskets for the DK-motors if you decide to remove them.

The DK-motors control the airflow to the manifolds. They are as it happends just above the VCVs. It´s easier to replace the VCVs if you remove the DK-motors, and at the same time you can clean the DKs. Over the years oil and other dirt can clog them causing ie. idle problems and not full effect throttle operation. In my case I noticed a little better responsiveness and perhaps slightly better fuel-economy after cleaning the DKs. If you decided to remove the DKs for either cleaning or better access to the VCVs, you should get new paper gaskets that fit between the DK assembly and the manifolds.
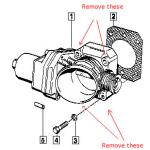
Here are some usefull partnumbers (for 750 owners): 11 61 1 708 475 : DK paper gaskets (get 2) (partno. 2 in illustration above)
11 15 1 718 642 : VCV valve (one side)
11 15 1 718 713 : VCV valve (the other side)
11 15 1 720 131 : Non-return valves that connect to hose between MAF and DK (get 2) You may decide to change the rear end gaskets on the manifolds too (where the airtemp sensors are located) to cure any leaks that might have developed over the years. In that case you should get 4 DK paper gaskets. They are the same. 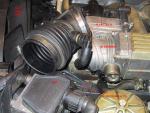 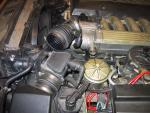 (hi-res) (hi-res)
Location of the various parts. VCVs are indicated with partnumbers.
Removal of DK-motors Loosen the two big hoseclamps that hold the large hose between the MAF and DK-motors in place. Remove the big hose, and remove the valve on it´s side with hose going down to the VCVs. You may choose to leave the valve and hose in place. You may want to cover the MAF output with a bag to avoid dirt entering. Loosen the DK-motors electrical connectors. These are screw/cliped on on top and bottom. If an un-authorized mechanic has been playing around you may experience some trouble if the tabs are broken off at either side. Small fingers and a flat screwdriver may be of help to turn the connectors so they can be pulled off. 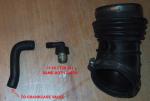
The big hose between the MAF and valve with smaller hose to VCV shown.
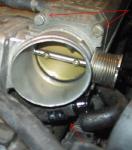
VCV valve. Bottom and upper DK-motor bolts arrowed. Note: Two bolts on bottom!
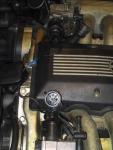
DK-connectors disconnected. Note mysterious loose single wire connector (blue tape).
Unbolt the 4 10mm hex head bolts that hold the DKs in place. The lower ones are easily accessed with a flexible socket tool (as shown below). 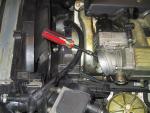
Unbolting the DKs.
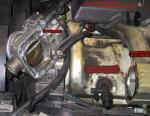
DK assembly removed showing VCVs, hoses and DK paper gaskets.
The DKs should come loose very easily from the paper gaskets. Clean off all of the old gaskets to make a smooth even surface for assembly later. 
DK-motor - inlet side.

DK-motor - outlet side.
The DKs are identical on both sides of a V8 or V12. The only difference is that the upper hose with release-valve is either mounted on topside, or bottomside of the DKs (see above picture). Cleaning the DKs should be done with care. Do NOT open the motors. Just clean the flaps and use a little grease to make sure they operate smoothly. Do NOT try and move the flaps by hand. Doing so WILL DAMAGE the DKs. You may also want to grease up the springs on the side of the DK assemblies. Replacing the VCVs As shown in picture above, the VCVs are easily accessed with the DKs removed. Just pull out the old VCVs taking care not to spill any dirt into the crankcase. You will want to clean the area around as it can be quite dirty (see above picture). I also removed the black hose going into the manifold from the VCVs and cleaned them too. This is easily done by loosening the clamps. The right side clamp can be trick as it´s tigther to get at. 
Right-side VCV-manifold hose clamp arrowed. Use 6mm hex head tool to loosen.
Assembly is reverse. Just take care to tighten all clamps and replace paper gaskets if you removed the DKs. You may want to grease up all electrical connectors before reconnecting them.
|
 DIY articles
  7-series 86-94
  Crankcase Ventilation